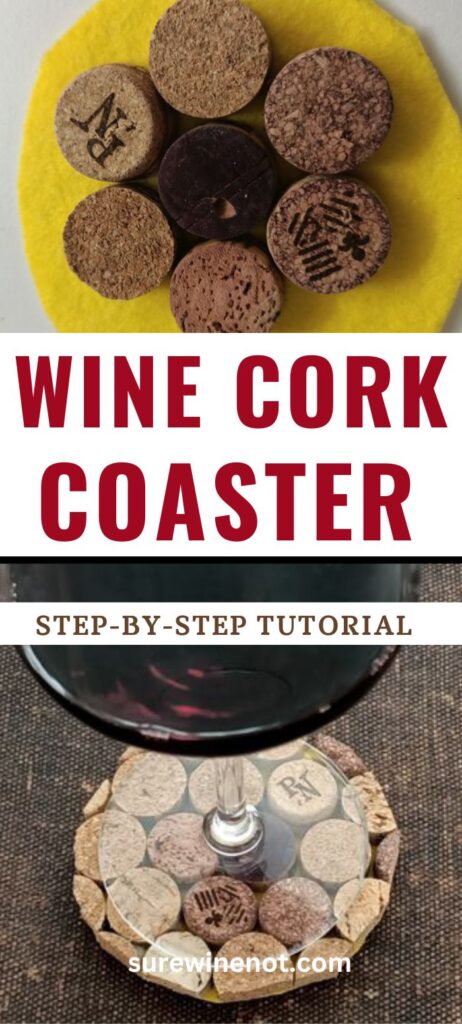
Wine cork coasters are a fun and easy DIY project that can add a touch of personality to your home decor and it is a great way to recycle wine corks.
In this step-by-step guide, we will show you how to make your own rustic wine cork coasters using simple materials and techniques.

Contents
Gather Your Materials
To make your own wine cork coasters, you will need the following materials:
- Wine corks
- A sharp knife
- Cutting board
- Ruler
- Sandpaper
- Hot glue gun
- Cork or felt backing material
- Scissors
Prepare wine corks
Start by preparing your wine corks. Rinse them in warm water and allow them to dry completely.
Cut your backing material
Using a cutting board and scissors, cut a circular piece of cork, cardboard or felt backing material.

Cut up wine corks
Cut wine corks into 1 cm discs using a sharp knife.
Smooth edges with sandpaper.
Create your design
Arrange the corks to fit your backing material.
Tip: Place first cork off-center and arrange the other corks around it like a flower and work to the edges.

Glue the corks together
Using a hot glue gun, glue the corks to the backing material and together.
Apply the glue evenly and hold each piece in place until it dries.
Cut wine corks to fit
Turn coaster over, felt side up. Cut wine corks to size.
Sand the edges with sandpaper if necessary.

Finish Your Coasters
Once your wine corks are securely attached to the backing material, you can clean up any stray glue.
Add a coat of clear sealant to protect your coasters from spills and stains.

Personalize Your Coasters
To add a personal touch to your coasters, use stencils, stamps, or paint to create designs or messages on the cork surface.
You can also add decorative elements like beads, buttons, or twine.
Display Your Coasters
Your DIY wine cork coasters are now ready to be used and displayed.
Place them on your coffee table, dining table, or bar area for a touch of style and functionality.
FAQs
Can I use any type of wine cork for this project?
Yes, you can use any type of wine cork for this project, including synthetic corks.
Do I need any special tools to make these coasters?
No, you don’t need any special tools for this project. You can use a sharp knife, a ruler, sandpaper, and a hot glue gun, which are all commonly found in most households.
Can I use a different type of backing material?
Yes, you can use a different type of backing material, such as wood or tile, depending on your preference and the style you want to achieve.
Can I personalize my coasters?
Yes, you can add a personal touch to your coasters by using stencils, stamps, or paint to create designs or messages on the cork surface. You can also add decorative elements like beads, buttons, or twine.
How do I clean my wine cork coasters?
To clean your wine cork coasters, simply wipe them with a damp cloth or sponge. Avoid soaking them in water or putting them in the dishwasher, as this can damage the cork material.
How many coasters can I make with a bag of wine corks?
The number of coasters you can make with a bag of wine corks depends on the size of the corks and the size of the coaster. On average, you can make around 5-6 coasters with a bag of 50 wine corks.
Can I use these coasters outdoors?
While wine cork coasters can be used outdoors, they are not as durable as other materials like stone or metal. Exposure to moisture and extreme temperatures can cause the cork to deteriorate over time.
Can I make these coasters as a gift?
Yes, wine cork coasters make a great personalized gift for wine lovers or anyone who appreciates a rustic touch to their home decor. You can create unique designs and messages to make them extra special.
Conclusion
Wine cork coasters are a simple and fun DIY project that can add a touch of personality and practicality to your home decor.
Recycling wine corks to make personalized wine coasters creates unique and functional pieces that are both stylish and eco-friendly.
For more fun ideas on great wine cork craft project, see our wine cork crafts Pinterest board.

Read with confidence: I am a certified wine expert (WSET L3).


